Wednesday, 29 April 2015

Scraplifting preprinted paper into layered layout

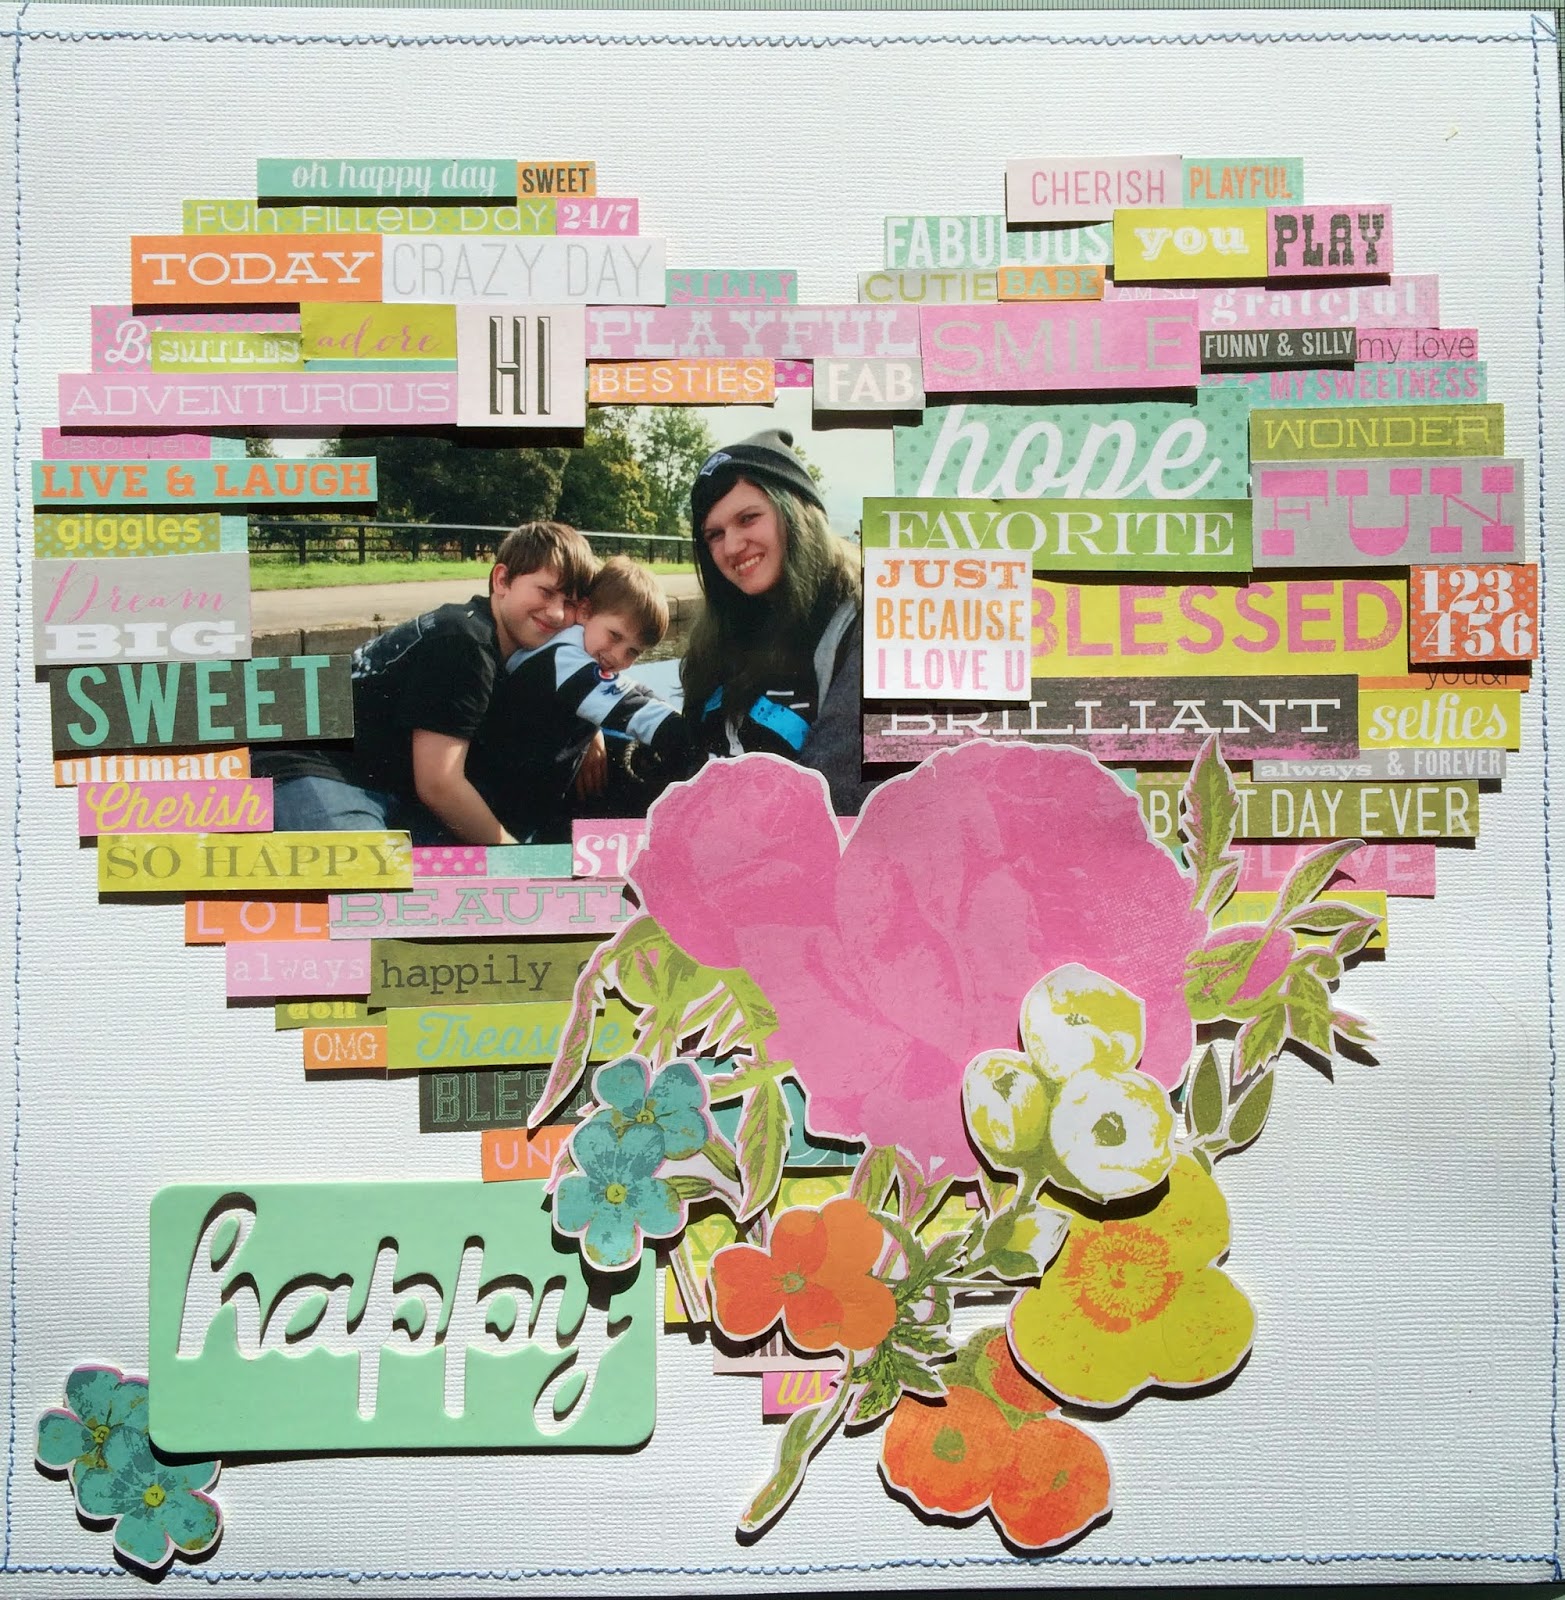
There are many fantastic papers with embellishments preprinted onto them, this is a great time saver or for inspiration but I just love the tactile effect of layered layouts.
This paper was by Heidi Swapp called Favourite Things, and the layout was scrap-lifted from her design on the packaging.

To begin I usually prepare the background I want for the embellishments, I find sewing adds a lovely effect and quick to do on any machine or with stamps.
Next I carefully cut out the embellishments with a craft knife where possible, as this then allows you the use the waste as a template for positioning your cut outs.
When repositioning your embellishments on top of your layout use a variety of depths of foam pads, and even attach some flat with tape or glue.
If the the preprinted design has ribbon, buttons etc designed on then replace these with real ones for a fantastic page.

Loves ya Becky x

Friday, 24 April 2015

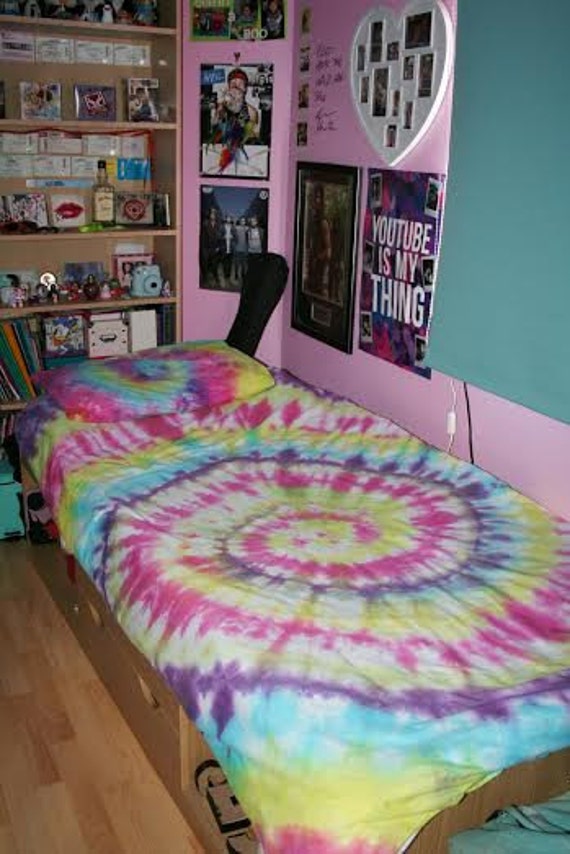
Talented Tie Die


Yes crafting is in the genes, my daughter has just opened her own Etsy store. This great duvet set is her first item, she hand makes them to order. She has made loads of t shirts too and just finalising her designs before adds them for sale. She has tons of ideas and planning on expanding during the summer to use the funds to support her through college...and knowing her a few concerts too 

Please take a look
Loves ya Becky x

Wednesday, 22 April 2015

How to turn any picture into a Silhouette Cameo file

I love my Silhouette Cameo but more so since I discovered how to turn any photo into a cutting file. This not only saves me money on buying designs from the Silhouette Store but also on creating unique personal designs.

I find for cutting choosing designs with simple lines such as colouring pages works best, but you can also scan drawings or handwritten quotes.


  1. Download or scan picture and save as jpeg or similar file
  2. On Silhouette Studio go to 'File' and select 'Open' Go into the folder where your image is stored
  3. Go to 'Files of type' and select 'All Files'. Every file in that folder will now be shown
  4. Click on image and it will now appear on your Silhouette Studio page
  5. Select the 'Trace' tool its along the top menu on right hand side (the grey square with the blue and yellow shape on) and the trace menu will appear at the right hand side of page
  6. Click on 'Select Trace Area' and form area over your design
  7. Now click 'Trace' from the right hand menu, this will form a cutting outline of your design
  8. Use pointer curse to click on image and move to side of page, you will then be left with your cutting image and your original image as separate parts.
  9. Click on original image so that it is highlighted in a box and press delete button on keyboard
  10. You will now just be left with your cutting file
  11. You can now add this as your own design in your cutting library by selecting 'File', 'Save As' and then clicking 'Save to library...'
  12. This is now your own design to use as you do any other design on your Silhouette
Tips
I always zoom into my image before saving to my library to fine tune, you can delete, edit any lines that you may think are too fussy or smooth over design.
You will also notice that in the trace menu there are other options such as trace outer edge, just have a play and see which works best with the design you want.

I will be adding many more tutorials like this regarding Silhouette Cameo, I do as a step by step as I always found it difficult to keep up with the videos while I learning these techniques. Please leave me comments as to if you like these, or what future features you would like me to cover

Loves ya Becky x

Saturday, 18 April 2015

Perfect Family Roast

There's nothing better than inviting family round and making a lovely roast dinner for everyone to enjoy, but that also includes myself, so here's a simple how to guide with some of the best recipes I've used, but also clever cheats so you get to enjoy time round the table instead of collapsing into your dinner plate at the end.
There is firstly the ingredients, along with links to cooking sites, a step by step cooking guide and also a timed schedule to ensure it all runs smoothly.

Roast beef & gammon joint, with roast potatoes, honey roast parsnips, carrot and swede mash, cauliflower, broccoli, carrot batons, green beans, stuffing and of course yorkshire puddings. Serves around 8, but if less can freeze excess veg dishes and use meat for other meals in week.

Shopping list
Beef Joint (I use topside), Gammon Joint
1.5 kg potatoes (I use maris piper), 1kg parsnips, 2 medium onions, 10 large carrots, 1 medium swede, 2 sticks of celery, 2 bulbs of garlic, pack of green beans, small cauliflower, broccoli
Cheat
Packet of stuffing mix, Vegetable gravy granules, Vegetable stock pot (I use Knorr)
Store Cupboard
Salt (sea salt best), Pepper, Butter, Honey, Olive oil, Thyme, Rosemary, Nutmeg, Plain flour, English mustard, Dark brown sugar, 2 eggs, Milk
Timer can use cooking timer or on phone etc
  • Tip if using dried herbs instead of fresh use about a third to what the recipe asks for this is a great converter
  • Whenever I say season it just means with salt and pepper

I tend to cook the meat first so it has time to stand, For the beef I use Jamie Oliver's recipe is perfect for all palettes and for the gammon I use a simple glazed recipe
My favourite roast potatoes are also a Jamie Oliver recipe, they have a wonderful crispy outside and fluffy inner.

Timesheet
Overnight Cover gammon in water and leave to soak overnight to draw out salt
Meat joints will vary depending on weight, so work this out beforehand to allow. You can cook your beef on top middle shelf and then add in gammon on lower middle shelf.
Morning Cook meet joints, I generally leave these wrapped in foil so stays warm so still stays warm while rest of meal cooking. If you calculate timing of joints so can begin cooking rest straight afterwards then your oven will already be preheated saving time and money.
Rest of meal takes around 1 1/2 hours to cook

  1. Add generous amounts of olive oil to muffin tin and heat in oven gas mark 7,  boil kettle
  2. Prepare batter mix by adding 70g of plain flour into a bowl, beat in 2 eggs until smooth and then gradually add in 100ml of milk until smooth and season. This will make 12 yorkshire puddings
  3. Prepare stuffing mix using boiled water, roll into individual balls
  4. Carefully pour batter mix in muffin tin, place on top middle shelf
  5. Place stuffing balls on baking tray on lower middle shelf 
  6. Set timer for 15 minutes, set a large pan of water to boil while peeling and cutting potatoes and parsnips
  7. Place baking tray with olive oil in bottom of oven
  8. Boil potatoes timer for 5 minutes
  9. Drain potatoes leave standing in drainer timer 4 minutes while peel and slightly crush garlic
  10. Remove Yorkshire Puddings and stuffing balls, place on plate and cover with foil to keep warm. Turn oven down to gas mark 5 
  11. Gently toss potatoes in colander to fluff them up a bit, put in preheated oil tray, add garlic and rosemary, and season, add extra olive oil and give a good shake to make sure evenly coated and spread out. Add another tray with generous amount of olive oil into oven timer 5 minutes
  12. Add parsnips to heated oil tray, toss so evenly covered, and season timer 25 minutes 
  13. Tip if having a starter now would be best time to prepare and serve, 
  14. Boil kettle timer 5 minutes while preparing 5 carrots and swede for mash cut in small cubes
  15. Add to boiling water and simmer covered timer 10 minutes If you want to slice your meat do it now. Also shake potatoes and parsnips in oven to get even cooking
  16. Set timer 5 minutes while boiling full kettle, prepare cauliflower and broccoli into florets, carrots into batons and de-string beans
  17. Add 2 tablespoons of honey to parsnips, and toss to cover evenly, return to oven
  18. Add cauliflower florets to boiling water and simmer timer 3 minutes
  19. Add carrots to boiling water and simmer timer 2 minutes
  20. Add green beans to boiling water and simmer, and start rapidly boiling another pan of water set timer for 3 minutes while you drain and prepare mash
  21. For mash add butter, seasoning and bit of nutmeg according to taste
  22. Add broccoli into rapidly boiling water to blanch, boil a kettle ready for gravy timer 2 minutes
  23. Remove everything from oven and hobs, and drain ready to serve. Toss green beans in a drizzle of olive oil and salt, add bit of butter and season carrot batons
  24. For gravy I use gravy granules as directed on packet but also add in a stock pot for extra flavour

Hope this helps to take some of the pressure and preparing a large family dinner. Bon appetite!

Love ya Becky x


Friday, 10 April 2015

My Top Tips To Get Your Creative Mojo Going And Use Your Stash

Scrapbooking is a great way to relax, and creative positivty, but sometimes perticually when your stressed out it can seem your creativity has run dry. Here are a few tips to get it flowing again;

Scraplift- Yes we all want to create that unique masterpiece, but we cant do that staring at a blank page. Scraplifting helps you learn new techniques, try new colours or styles, think of it more like taking a class.
Think of it this way if you are creating pages for your family are they really going to care that you based on someone elses ideas. Your pages will still always be unique as they have your photos on, all that really matters is that you created something beautiful. Also you can then use all the new things you learn in a page design of your own.

Page maps- these offer a great template to take the stress away from creating a design, but allows you to create something unique as you use your own, paper, embellishment etc.  Page MapsScrapbook Challenges

Challenges- there are many sites which set weekly or monthly challenges, some are to follow a sketch, particular colour, embellishments or themes but they all help give inspiration. Split Coast StampersUK Scrappers

Use old stash- Do you really need the latest papers, embellishments to creat something great? Nobody looks through your scrapbook and says thats last seasons designs, and in years to come whatever you made is going to be old designs so it really doesn't matter. Revamp old stash with new techniques, ink them, mist them, style and die cut, it will all look fab.

Stop stroking papers and use them- yes most of us are guilty of this, that piece of paper thats too nice to use, or your worried you wont get again. Use these papers, embellishments let them be admired from being turning into something beautiful, than hidden in your craft box. If they are really special create something you can hang in your home so you can get full appreciation of it.

Stuck on what to do with a paper range? then google it- Im always buying papers i love but have no idea what to do with them so i do an internet search. Type the paper range name in google image search, or on pinterest there will be lots of inspiration or designs

Print photos last- sometimes you just want to create so do it. design and build a page, by cutting a blank photo from card and add photo at end. If there are any over lapped embellisments secure temperaly with blu tack, or if sticky place a backing sheet that can be peeled off later. By adding photo last if allows you to print off whatever size or colourway best suits your design.

Don't overload yourself - Scrapbooking is meant to be enjoyable, don't stress that you have a ton of old photos to scrap, scrap whatever inspires you. Too often we get overwhelmed at scrapbooking the past that we forget to record those everyday moments in the present. You may always have those super cute baby photos on the 'to do' pile, but if you want to scrap your toddler about a funny thing they said or did, then do this while the memory is still fresh
Same is true with classes such as Journal Your Christmas, while you may love idea of creating a page everyday, if time doesn't allow this don't get disheartened, simplify and do what matters most to you.

Well I hope this tips get you started, there is going to be lots on this blog about making your own embellishments, revamping old stash and setting challenges

Loves ya Becky x

Wednesday, 8 April 2015

Felt Food- Tortilla Wraps

This is my version of a tortilla wrap, it has wire inside so it can be folded. Vegetables, salad etc can be added into it to make whatever wrap you want
Materials
Templates 6 inch circle and 5.5 inch circle
Cream felt
Cream embroidery thread
Coated wire
Insulation tape
scisscors, pencil, needle and pins
Instructions
1)cut out two 6 inch circles from cream felt
2)tack together with pins around outer edge
3)draw a 5.5 inch circle and straight stitch along this joining pieces together
4)remove pins
5)place wire inside outer flap
6)secure wire into place by whip stitching around outer edge
7)before finishing stitching, trim any excess wire and join together using instulation tape
8)finishing stitching edge to encase remaining wire section
9)losely fold to form tortilla wrap shape

Monday, 6 April 2015

Easter Morning Baskets


I like to do the kids a gift of mini Easter treats, these are perfect to snack on as we save the big eggs for sharing on evening together.
This year I wasn't well enough to do a big fancy gift bags so i pulled out my trusted Silhouette Cameo, purchased this design, and within a few minutes had 4 lovely baskets. 
Now add in my daughter deciding she needed a ukulele card for one of her favourite youtubers. she designs, I cut it out on my Silhouette and she puts together an unique card with matching envelope. What would she doing without her crafty mom? ;-) 

The Silohette Cameo is a fantastic tool which I rely on quite a bit for fussy cutting, I'm still learning a lot so there going to be plenty of tutorials and useful tips in future blog posts.

Loves ya Becky x

Friday, 3 April 2015

How to Survive School Holidays with Teenagers and Toddlers

Here's a few tips I use for surviving school holidays to keep everyone happy without breaking the bank or yourself


  • Remember the children are on holiday too, they don't want to be tired out from too many activities.
  • Make a plan. Kids like structure, if they know that a day of cleaning will mean being rewarded by day out later in week, then you will meet less resistance and nagging. The same is true if you plan games, films, and other activities.
  • For each holiday I generally plan a tidy up day, an outing, a day for friends, an activity day, a shopping day and a chill out day
  • Tidy up at start of week gives a fresh start which frees up time later in week to spend together. Cleaning out wardrobes can mean a fun shopping trip, or sorting toys to donate can be rewarded by new toy later in week.
  • Activity days are not just for young children, its amazing how older children will join in with designing bags, tie die and especially cooking
  • Allow a day for older children to go out with friends while younger children have a play date
  • Games, movies and TV nights are a great way of bonding and making children feel you have made time for them. These activities seem to work best on an evening, we start with ones suitable for younger child which everyone takes part in and then once youngest go to bed continue activity theme with older children
  • Box sets are great during holidays, watch a film or episode each night, it keeps a routine and something to be anticipated everyday
  • Respect that each child will want time on their own too. Younger children have been at nursery or school, they have toys they don't get chance to play with on normal working weeks. Teenagers want to relax playing on computer, read etc, so use this time to relax yourself or do chores.

Many establishments offer weekday or off peak discounts school holidays are great for taking advantage of these;
  • Cinema-Many cinemas also offer discounts on set weekdays or if you visit before 5pm
  • Off Peak Travel- many operators offer discounts on transport for travelling after 9:30am, if you plan your outing then travel especially on trains can be prebooked weeks in advance for biggest discounts. Always ask about family tickets when using public transport, there are some very good deals
  • Restaurants- Many offer discounts for early bird eating, one of our favourites is Pizza hut buffet, but it always worth checking on website
  • Discount sites- check out sites such as GrouponWowcher and Vouchercloud can offer discounts on days out and restaurants. It is worth checking these out a few weeks before holidays to help plan outings and spread cost
  • Always do an internet search for discounts where you want to go, there usually advance tickets, offers to print or discount codes
  • Linked tickets- many travel operators have deals to offer discounts to visitors using public transport, many of these vouchers need to be printed at home first, but you canend uo saving a lot more than what the travel ticket costs


Loves ya Becky x

Tuesday, 31 March 2015

"Mom, Toothless needs some fish"

I have made my own trap with being a crafty mom, suddenly the kids see something cool, or think up an idea and its "Mom can you make us one?"

My youngest son Quinn is mad on How to Train Your Dragon film and when Build-a-bear sold out of the Toothless cuddly I decided to make him one instead. It started as small project by simply downloading a pattern from this artist website and making from felt....but then he wanted one he could ride on....so I decided to just make head and turn into hobbyhorse style. Quinn however decided it needed wings...and a tail...and a body!

The pattern got blown up into a poster size, and after a few days frantically sewing I created a 2 metre long with 2 metre wingspan dragon. It has a broompole running through centre, with wired wings attached onto it, which makes it robust enough to ride on and handle any young viking's adventures. Quinns reaction was "Mom he needs a saddle too" So another few hours sewing, I have one dragon with detachable saddle, tail fin and one very happy little boy.


Fast forward 6 months later and Quinn now has a dragon from Build-a-bear too, but decided Toothless now needed some pretend fish to eat.

  1. Handcut fish template from card, draw 2 shapes onto felt for each fish leaving room for seam
  2. Sketch on details such as face and fins, then handstitch using embroidary thread, remember these are opposite sides so need to be a mirror reflect of each other
  3. For eyes I cut out 2 small circles and attached on by stitching a white pupil.
  4. Place fish shapes together so inside out, tack with pins and stitch all around leaving tail end open
  5. Turn the fish inside out so now it all right way stuff and sew up tail end
  • If you wish you can glue a small magnet inside, and then glue the opposing magnet into the cuddly toy by the mouth so he can                                                                                     pretend to eat it
The things we do for our kids, but it worth it to see them say "Wow!!"

Loves ya Becky x

Monday, 30 March 2015

Welcome

Hi and welcome to my all new blog. Yes I have tried blogging in past but life got in the way...so I have had this crazy idea of embracing all that chaos into one blog. Of course this is with a little help from the lovely Shimelle and her online courses

So lets share it all; the fun arty, crafty things that I do to keep myself sane, the beautiful family that I share my life with, and the new skills I discover along the way. But not forgetting the rest; the tips for living with teenagers and toddlers, financing our family life, and overcoming hurdles.

Life is a rollercoaster, you can either scream every time there is a bump...or you can throw your hands up and enjoy the ride

Loves ya Becky x